Transform your fireplace mantel from forgotten ledge to stunning focal point by starting with a clean slate—remove everything currently displayed and give the surface a thorough cleaning. Measure your mantel’s dimensions and photograph it from multiple angles so you can plan arrangements that complement its specific proportions and your room’s sightlines.
Gather foundational pieces you already own before buying anything new. Hunt through your home for items with varying heights, textures, and visual weights—think candlesticks, picture frames, small plants, or decorative boxes. This inventory becomes your styling toolkit and reveals what gaps actually need filling versus what Instagram tells you to buy.
Create visual balance using the rule of thirds by dividing your mantel into three sections mentally. Place your largest or most eye-catching piece slightly off-center as an anchor, then build outward with progressively smaller items. Layer objects at different depths by positioning some items against the wall and others near the mantel’s edge to add dimension and prevent that flat, lineup look.
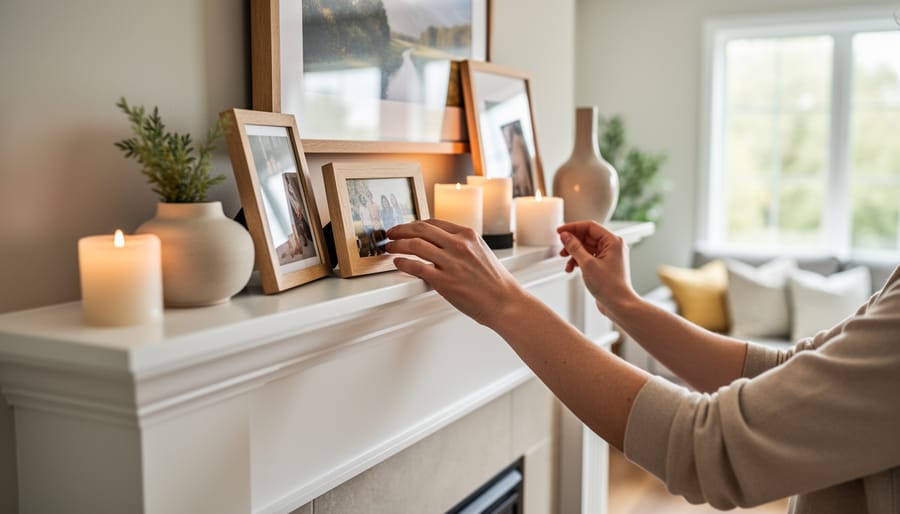
Test arrangements before committing by taking quick phone photos of different configurations. What looks perfect to your eye while standing at the mantel often photographs differently, revealing balance issues or awkward spacing you’ll notice from your couch. This trick saves countless rearrangements and helps you see your design with fresh perspective.
If your fireplace needs structural attention before becoming decor-ready, this company provides professional chimney services. Once your foundation is solid, you’re ready to style with confidence and creativity.
Why Your Mantel Deserves More Attention (And How It Changes Everything)
I’ll never forget the weekend I finally tackled our outdated oak mantel, the one that had been collecting dust bunnies and random picture frames since we moved in. I spent maybe two hours rearranging items I already owned, added some greenery from the yard, and suddenly our entire living room felt intentional. My husband walked in and asked if I’d painted the walls. That’s the power of a well-styled mantel.
Here’s the thing about your fireplace mantel: it’s commanding attention whether you’re giving it any or not. Positioned at eye level in what’s typically the main gathering spot of your home, it’s the first place visitors’ eyes land when they enter the room. When it’s cluttered or bare, it whispers “unfinished” to everyone who sees it. When it’s thoughtfully decorated, it anchors your entire space and sets the tone for your welcoming living room.
The mantel acts as a bridge between your ceiling and floor, creating vertical interest that draws the eye upward and makes rooms feel more spacious. It’s also remarkably forgiving territory for experimenting with your personal style. Unlike repainting walls or buying new furniture, mantel decor can be changed seasonally, swapped out on a whim, or adjusted until it feels just right.
What makes this space so transformative is its ripple effect. A styled mantel influences how you perceive your seating arrangement, your wall color choices, even your lighting. It creates a natural gathering point that makes your fireplace area feel purposeful rather than forgotten. And the best part? You don’t need a huge budget or advanced design skills to make it happen.
Start With the Right Foundation: Mantel Prep That Makes DIY Decor Shine
Measuring Your Canvas
Before you start gathering decor, grab a measuring tape and get friendly with your mantel’s dimensions. This simple step will save you from the frustration of buying pieces that overwhelm your space or disappear entirely.
Start by measuring your mantel’s length, depth, and the height from the mantel surface to the ceiling. Here’s why this matters: a 60-inch mantel can handle larger statement pieces, while a compact 48-inch version works better with smaller, curated groupings. The depth tells you how far forward items can sit without looking precarious, and that ceiling height? It determines how tall your tallest piece should be.
A good rule of thumb I always share: your largest decor element should be about one-third the length of your mantel. So for that 60-inch mantel, think pieces around 20 inches wide. This proportion creates visual harmony without mathematical headaches.
Also consider the fireplace opening below. If you have a grand, wide opening, delicate decor above might look lost. Balance is your friend here. Jot these measurements in your phone, they’ll become your shopping companions and help you make confident choices that look professionally styled.
Style Matching vs. Style Mixing
Here’s the truth: there’s no wrong answer when it comes to matching versus mixing styles on your mantel. Both approaches can look absolutely stunning when done intentionally.
Matching your existing decor creates a cohesive, polished look that feels harmonious with your space. If you’ve invested time in your living room design ideas, extending those colors, textures, and themes to your mantel reinforces your overall vision. This approach works beautifully in homes with a strong architectural style, where consistency enhances the room’s character.
On the flip side, mixing styles intentionally can create a dynamic focal point that draws the eye and adds personality. The key word here is intentional. Choose one element to unify your pieces, whether that’s color, material, or scale. For example, pairing rustic wood with sleek metallics works when they share a similar color temperature.
My advice? Start by asking what you want your mantel to do. Should it blend seamlessly or command attention? Let that answer guide your choice, then commit fully to your direction.
Layering Magic: The Secret to Professional-Looking Mantel Displays
The Back-Middle-Front Method
The secret to creating mantel displays that look professionally styled lies in thinking about depth. The back-middle-front method is my go-to approach, and once you understand this simple layering technique, you’ll wonder why your previous arrangements felt flat.
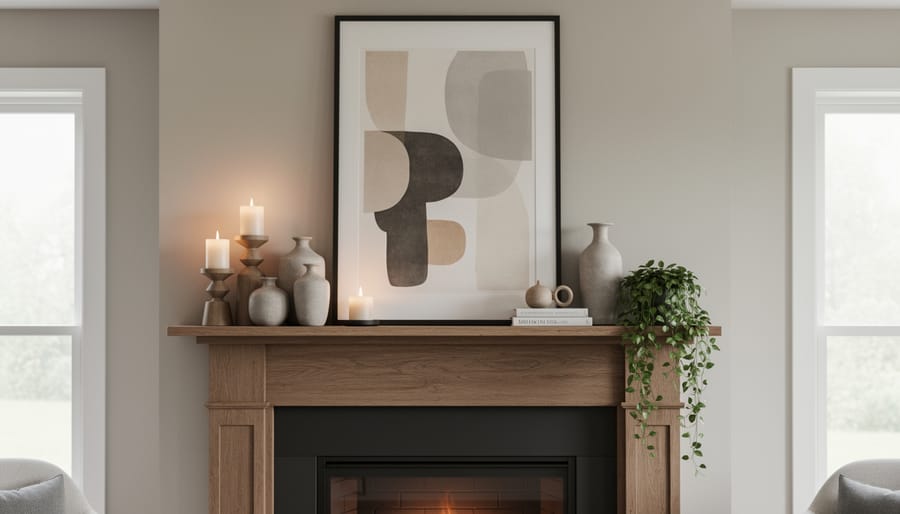
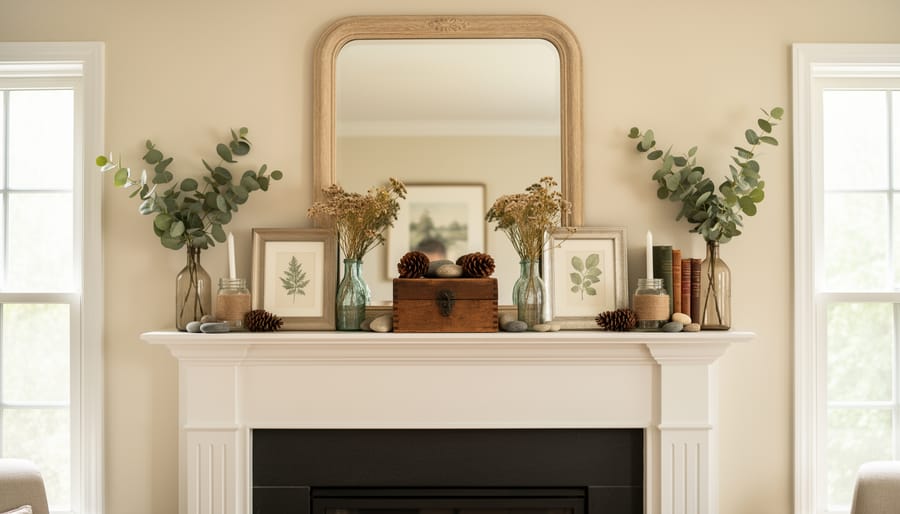
Start with your back layer. This is where your tallest items go, positioned against the wall. A large mirror works beautifully here, or try leaning a framed piece of art. Even a decorative window frame from a flea market creates instant visual interest. These anchor pieces should typically be centered on your mantel for balance.
Next comes the middle layer, where you’ll add medium-height items about 6-8 inches in front of your back piece. Think candlesticks, small vases with flowers, or stacked books. This is often where I place items with interesting textures like a ceramic pitcher or a wooden bowl. The key is varying the heights slightly within this layer so your eye moves naturally across the arrangement.
Finally, your front layer brings everything together with smaller objects placed near the mantel’s edge. I love using items like small succulents, decorative boxes, or a few scattered pinecones here. These pieces shouldn’t be taller than 4-5 inches to maintain that layered effect.
Here’s a practical example using everyday items: lean a large cutting board in back, place two different-height candlesticks in the middle, and arrange three small potted herbs across the front. This creates dimension while keeping things simple and approachable.
Playing With Heights and Textures
Creating depth on your mantel is all about the magic number three—three different height levels, that is. Think of it like staging a photograph where you want foreground, middle ground, and background interest.
Start with your tallest pieces at the back or sides. A 24-inch candlestick or vertical picture frame anchors your display. Your medium-height items, like an 8-12 inch vase or stack of books, create the middle layer. Finally, lower elements such as small boxes, candles, or decorative bowls bring the eye downward, completing the visual journey.
Now let’s talk texture—this is where your mantel transforms from nice to wow. Mix smooth ceramic with rough woven baskets. Pair glossy metallics against matte wood finishes. I learned this trick when I placed a sleek brass candleholder next to a chunky knit throw draped casually over one end. The contrast made both pieces stand out.
Here’s your action step: gather five items from around your house in varying heights. Include at least three different materials—maybe glass, wood, and metal. Arrange them using the tallest pieces as bookends on either side, clustering your shorter items slightly off-center. Step back every few minutes to assess. You’ll immediately see how this dimensional approach brings your mantel to life without spending a dime.
Budget-Friendly DIY Mantel Decor Ideas You Can Make This Weekend
Five-Minute Fixes That Make an Instant Impact
Sometimes the most dramatic transformations happen in the least amount of time. If you’re staring at a bare mantel and need instant results, these five-minute fixes will give you a professionally styled look without the fuss.
Start with the effortless elegance of branch arrangements. Simply gather three to five branches of varying heights from your yard or local park—think cherry blossoms in spring, colorful leaves in fall, or even bare winter branches. Place them in a tall vase positioned on one end of your mantel, and you’ve instantly added natural texture and vertical interest. The formula: odd numbers create visual appeal, and height should be roughly 1.5 times your vase height.
For book stacking, pull five to seven books from your shelves in coordinating colors. Stack them horizontally in groups of two or three, placing the largest books at the bottom. Top the tallest stack with a small decorative object like a vintage clock or ceramic piece. This creates varied heights while showcasing your personality through book selections.
Candle arrangements follow a simple rule of three: group candles in odd numbers with varying heights. Use pillars in white or cream for a cohesive look, placing the tallest candle slightly off-center. Add smaller votives or tea lights around the base for dimension.
Finally, create an instant thrifted frame gallery by gathering five to nine frames in similar finishes but different sizes. Lean them against the wall in a layered arrangement, overlapping edges slightly. Leave some empty or add botanical prints for a collected-over-time aesthetic. This casual approach feels intentional yet relaxed, giving you gallery-worthy style in minutes.
Weekend Projects Worth Your Time
Ready to roll up your sleeves for something more substantial? These weekend projects deliver serious impact and give you pieces you’ll treasure for years. I’ve tackled each of these myself, and while they require a bit more time commitment, the results are absolutely worth it.
Let’s start with a custom painted wooden sign. Grab a piece of reclaimed wood (approximately 24×8 inches works beautifully), sandpaper, primer, acrylic paint, and a stencil or vinyl lettering. Sand your wood until smooth, apply primer, then paint your base color. Once dry, add your chosen quote or family name using stencils. I recommend phrases like “Gather” or “Home Sweet Home” for timeless appeal. Seal with matte polycarbonate spray for durability. Total cost: around $15-20, and you’ll have a signature piece that reflects your personality.
Next up is a eucalyptus and ribbon garland that looks professionally made. You’ll need fresh or preserved eucalyptus branches, floral wire, wire cutters, and 2-3 yards of velvet or burlap ribbon. Start by creating small bundles of eucalyptus, securing each with floral wire. Overlap bundles as you wire them together, creating a base approximately 6 feet long. Weave your ribbon through the garland, securing at intervals. This project takes about two hours but creates that designer look everyone asks about.
For architectural drama, scout salvage yards for vintage corbels, decorative brackets, or old window frames. Clean them thoroughly, decide whether to preserve the patina or paint them, then incorporate them as bookends or vertical accent pieces on your mantel. I found two corbels for $12 each that now anchor my entire display.
Finally, create concrete planters for succulents using silicone molds, quick-setting concrete mix, and cooking spray. Mix concrete according to package directions, spray molds with cooking spray, pour and let cure for 48 hours. These modern vessels add texture and living elements to your mantel arrangement.
Seasonal Rotation Ideas That Keep It Fresh
The secret to a mantel that never feels stale is creating a strong foundation with pieces that work year-round, then swapping out just 2-3 seasonal accents. Think of it like having a capsule wardrobe for your mantel.
Start with your base layer: a quality mirror or artwork, candlesticks in neutral finishes like brass or matte black, and perhaps a sculptural element that transcends seasons. These anchors stay put all year. Then designate specific spots for your seasonal stars—maybe the center of the mantel and both ends.
For spring, swap in fresh florals or a ceramic pitcher. Summer calls for coral branches or blue glass. Fall brings in pumpkins and wheat bundles, while winter welcomes evergreen sprigs and mercury glass. The beauty of this approach is you’re only changing a fraction of your display, making transitions quick and budget-friendly.
Storage is crucial for making rotations actually happen. I keep clear bins labeled by season in my hall closet, each containing just the essentials. Wrap delicate items in tissue paper and photograph your favorite arrangements before packing them away—you’ll thank yourself when unpacking next year. This system means you can refresh your mantel in under fifteen minutes, keeping your space dynamic without the decorating overwhelm.
Working With Different Mantel Styles and Challenges
When Your TV Lives Above the Fireplace
Let’s be honest—decorating around a TV mounted above your fireplace can feel like a design puzzle. The good news? You can absolutely create a beautiful, balanced look that doesn’t feel cluttered or awkward.
The key strategy here is what I call the flanking method, and it’s become my go-to solution for clients struggling with this exact setup. Instead of trying to compete with your TV or pretend it doesn’t exist, work with it as your central focal point.
Start by placing matching elements on either side of your television. This creates symmetry that feels intentional rather than random. Consider tall candlesticks, slender vases with greenery, or framed artwork leaning against the wall. The matching items act as bookends, visually anchoring the TV as part of your overall design rather than an afterthought.
Keep your mantel arrangements relatively low-profile when you have a TV overhead. You want to avoid a top-heavy look that draws too much attention upward. Stick with items no taller than 8-10 inches for the main body of your display, with perhaps one taller element on each end for vertical interest.
Another trick I love: use a decorative tray or shallow bowl on one side of the mantel to corral remotes and small accessories. This gives practical items a designated home while maintaining your aesthetic. Layer in personal touches like small framed photos or collected objects between your flanking pieces.
Remember, less is more here. Three to five carefully chosen items will look far more sophisticated than a crowded surface competing with your screen.

Maximizing Narrow or Shallow Mantels
Working with a narrow or shallow mantel doesn’t mean sacrificing style—it just means getting creative with how you use the space. I learned this firsthand when I moved into a historic apartment with a gorgeous but ridiculously shallow mantel shelf. At first, I was frustrated, but then I discovered some clever workarounds that actually made my display more interesting.
The secret is thinking vertically. Instead of crowding items onto your limited shelf space, create height by leaning tall artwork or mirrors against the wall. This draws the eye upward and makes the entire fireplace wall your canvas, not just that narrow ledge. I love using a large piece of framed botanical art flanked by two slim candlesticks—it creates impact without depth.
Wall-mounted floating shelves on either side of your mantel are game-changers for shallow spaces. Install them at staggered heights to create a gallery effect that extends your display area without touching the mantel itself. This technique gives you room for books, small plants, or decorative objects that would otherwise topple off a shallow shelf.
Choose slim-profile decor specifically designed for tight spaces. Flat-backed vases, picture frames instead of chunky sculptures, and items you can secure with museum putty work beautifully. A simple garland draped along the front edge adds softness without requiring depth, and battery-operated fairy lights woven through greenery create ambiance while lying nearly flat.
Remember, sometimes less really is more—a few carefully chosen pieces often look more intentional than a crowded arrangement anyway.
Color Coordination That Actually Works (Without a Design Degree)
You don’t need an art degree to create a mantel that looks professionally styled. The secret lies in understanding a few simple color coordination principles that designers use every day.
Start with the 60-30-10 rule, which is incredibly forgiving on mantels. Your dominant color (60 percent) should match your room’s main hue, whether that’s the wall color or your largest furniture piece. On my own mantel, I use cream as my dominant shade since it echoes my living room walls. The secondary color (30 percent) adds interest without overwhelming the space. I chose sage green through two medium-sized vases. Finally, your accent color (10 percent) provides that pop of personality. For me, it’s warm copper in small candleholders.
Monochromatic schemes are your foolproof option. Choose varying shades of one color family, like navy, sky blue, and powder blue together. This approach creates sophisticated depth while eliminating the guesswork. I’ve seen stunning mantels using all-white decor with different textures providing visual interest.
Complementary colors sit opposite each other on the color wheel and create dynamic displays. Think blue and orange, or purple and yellow. The trick is using one color as your main player and the other as a subtle accent. A predominantly white mantel with coral accents and teal blue books creates impact without chaos.
The easiest path forward is pulling colors directly from your existing room palette. Look at your throw pillows, curtains, or artwork and repeat two or three of those colors on your mantel. This instantly ties everything together and makes your fireplace feel intentional rather than randomly decorated.
One practical tip I always share: take a photo of your mantel with your phone. The camera reveals color balance issues your eye might miss in person, helping you adjust before committing to your arrangement.
Common Mantel Decorating Mistakes (And How to Avoid Them)
We’ve all been there – you arrange everything just so on your mantel, step back, and something feels… off. Don’t worry, these decorating hiccups happen to everyone, and they’re actually valuable learning moments. Let me walk you through the most common slip-ups I see (and have definitely made myself) and how to fix them.
The biggest culprit? Overcrowding. When you love lots of little treasures, it’s tempting to display them all at once. But a mantel packed with too many items creates visual chaos rather than charm. The fix is surprisingly simple: edit ruthlessly. Start by removing everything, then add back only your favorite pieces one at a time. If something doesn’t earn its spot, save it for seasonal rotation.
Scale problems sneak up on everyone. Those adorable tiny candlesticks might look lost on a large mantel, while oversized artwork can overwhelm a petite one. Your mantel needs variety in heights and sizes to create visual interest. Mix tall candlesticks with medium vases and smaller accessories, ensuring your tallest piece is roughly two-thirds the height of your mirror or artwork.
Here’s a paradox: matching everything too perfectly actually makes your display feel flat and uninspiring. Instead, aim for coordinated but not identical. Use a cohesive color palette, but vary the textures, shapes, and finishes within that scheme.
Forgetting negative space is another common mistake. Your mantel needs room to breathe. Those empty spaces aren’t wasted – they give your eye a place to rest and make your featured pieces shine brighter. Aim for about 30 percent breathing room.
Finally, don’t neglect the wall above your mantel. It’s prime real estate that anchors your entire arrangement and creates vertical balance.
Shopping Smart: Where to Find Affordable Mantel Decor
Creating a stunning mantel doesn’t require draining your bank account. I’ve discovered some of my favorite pieces at completely unexpected places, and I’m excited to share where you can find beautiful decor without the designer price tag.
Thrift stores and estate sales are absolute goldmines for unique candlesticks, vintage frames, and one-of-a-kind objects that add character you simply can’t buy new. I once found a stunning brass candleholder for three dollars that would’ve cost sixty at a home store. The key is visiting regularly since inventory changes constantly.
Nature offers the best freebies. Branches, pinecones, stones, and seasonal foliage cost nothing but a pleasant walk outside. These organic elements bring authentic texture and can be swapped out as seasons change, keeping your mantel fresh year-round.
Discount retailers like HomeGoods, Target’s clearance sections, and even dollar stores surprise me with their seasonal finds. Stock up on basics like pillar candles and simple vases here.
Here’s my golden rule for splurging versus saving: invest in larger anchor pieces like mirrors or artwork that you’ll keep for years, but save on smaller accessories and seasonal items that you’ll rotate frequently. Before shopping, measure your mantel and snap a photo of your space. This prevents impulse purchases that don’t fit or match your vision.
Shopping with intention means you’ll build a collection of pieces you truly love rather than cluttering your mantel with regrettable buys. Your budget will thank you, and your mantel will look intentionally curated.
Your fireplace mantel is more than just a decorative ledge—it’s a canvas for your creativity and a reflection of who you are. The beauty of DIY mantel decor is that it doesn’t require a designer’s budget or professional expertise. Some of my favorite mantels I’ve seen have been those where someone simply arranged their grandmother’s vintage books alongside a thrift store mirror and called it done. It was perfect because it told their story.
Remember, there’s no rule book that says you need to spend hundreds of dollars or follow every trend that pops up on social media. Great mantel decor comes from experimenting with what you already have, mixing in a few intentional pieces, and giving yourself permission to try something new. If it doesn’t work, you can always rearrange it tomorrow.
Start small today. Pick just one element from this article—maybe it’s creating that simple greenery arrangement or moving your existing decor into a triangular layout. Take fifteen minutes to play around with it. You might surprise yourself with how quickly your mantel transforms from overlooked to absolutely eye-catching. Your living room is waiting for that personal touch only you can give it.